Hello guys, welcome back to our blog. Here in this article, we will discuss the erection of electric poles that is PCC poles and RCC poles, the materials required to erect the electric poles, and their specifications.
If you have any electrical, electronics, and computer science doubts, then ask questions. You can also catch me on Instagram – CS Electrical & Electronics.
Also, read the following:
- What Is ASIL A B C D, Purpose, Applications, Working, Examples
- What Is SoH In Battery, State Of Health, Methods, Purpose
- What Is Wireless BMS, Battery Management System, Benefits, Working
Erection Of Electric Poles
To erect the LT or HT line, the contractor will follow some steps :
- Land size
- Depth of digging
- Pole and Baseplate
- Pole installation
- Bricks and Mud
- Fixing cross arm
- Fixing pin insulator
- Placing conductor
These are the steps that are followed by the contractor to erect LT or HT lines, now we will explain to you all step by step the erection of electric poles.
01. Land Size
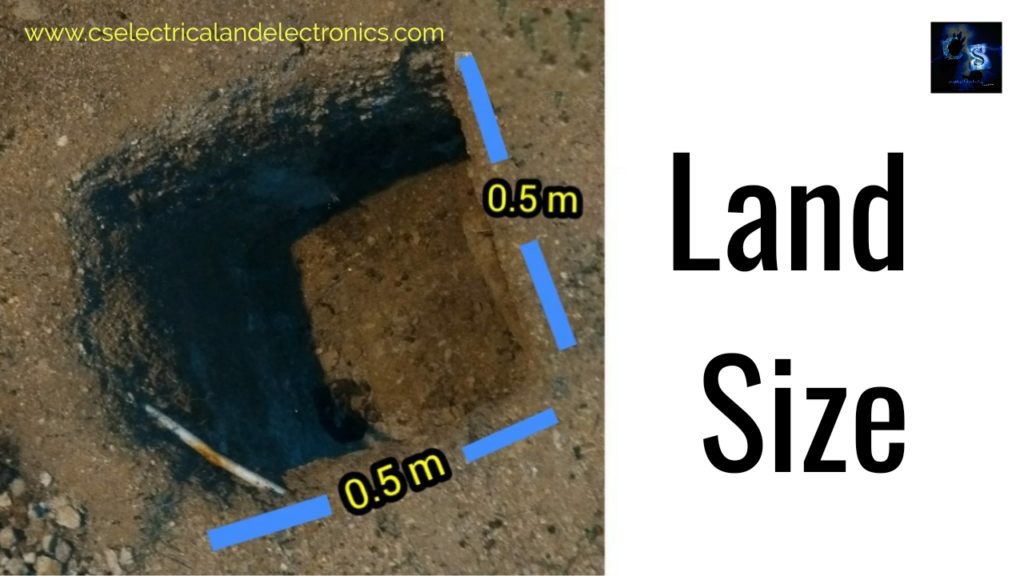
Land required for the erection is the 0.5-meter length and 0.5-meter width as shown in the above figure.
02. Depth of digging
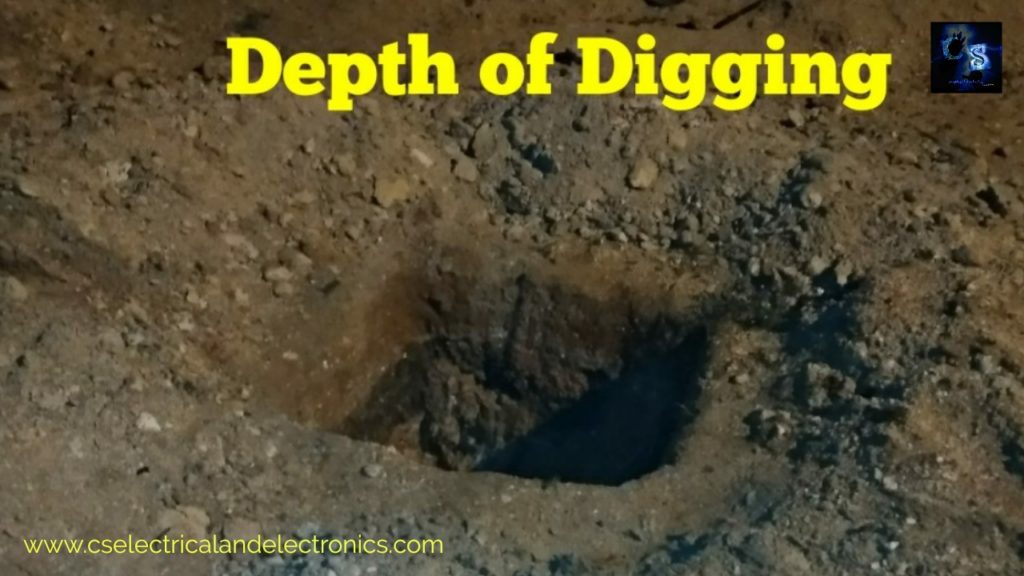
The depth of digging of the pole depends upon the length of the pole, suppose your pole is 7-meter height, its 1/6th part will go underground and if your pole is 8 meters long, its 1/6th part will go underground.
For example :- 8 meter pole = 8÷6 = 1.33 m
Therefore, for 8-meter pole 1.33m + 0.075m part will go underground. why I am adding 0.075 m I will discuss later.
Digging is done by two methods one method is by labor and another method is by machines. A machine used for digging can dig a depth of 1 – 3.8 meters, digging machine cannot be used in rocky places, whole sand beds, and garbage households.
03. Pole and Baseplate

Once the digging is completed now it’s time to bring poles and a base plate. Poles are brought by vehicle. The base plate means it is made up of stone. The length and width of the base plate are 450mm whereas the thickness of the base plate is 0.075 meters. After digging the base plate is kept at the bottom, so I added 0.075 m during the depth of digging. Once the base plate is kept then above the base plate pole is kept.
04. Pole installation

After placing a base plate at the bottom now it’s time to install the pole. Pole is installed in two ways, one is through labor with some ropes and a ladder & the way is by crane. In these two ways, the pole is installed.
Nowadays digging machines are used for pole installation. You can watch my video about the digging machine.
05. Bricks and Mud
Once the pole is installed, put some bricks and Mud. Put 60 % bricks and 40 % mud layer-wise, after putting compress it by using the rod.
06. Fixing the cross arm
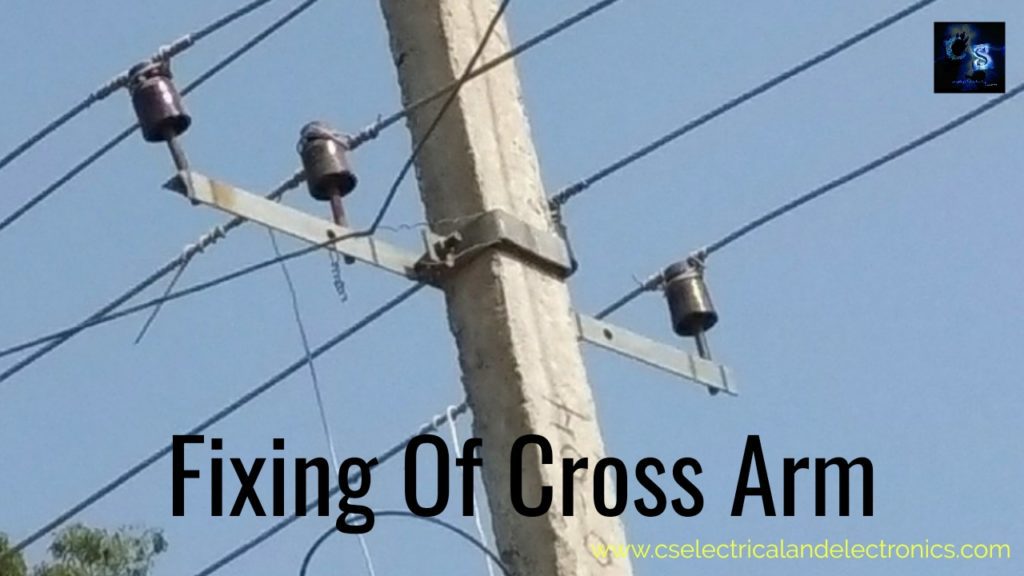
Once the pole is installed now it’s time to fix the cross arm. Four pin cross arm is used in the Lt line and a three-pin cross arm is used in the HT line. The size of the four-pin cross arm is 1.05 meters. The Cross arm is fixed to the Pole by means of pole clamps as shown in the above image.
What is Cross Arm and Types of Cross Arm
The function of line support (pole) is to support the line conductors at a safe distance from the ground whereas the function of cross arms is to keep the conductors at a safe distance from each other and from the pole. Cross Arm is a cross-piece fitted to the pole top end portion by means of brackets, known as pole brackets, for supporting insulators.
Cross arms are of various types such as MS channel, angle iron, or wooden. These may be straight, U-shaped, U-shaped, or zig-zag-shaped, as shown in the below image.
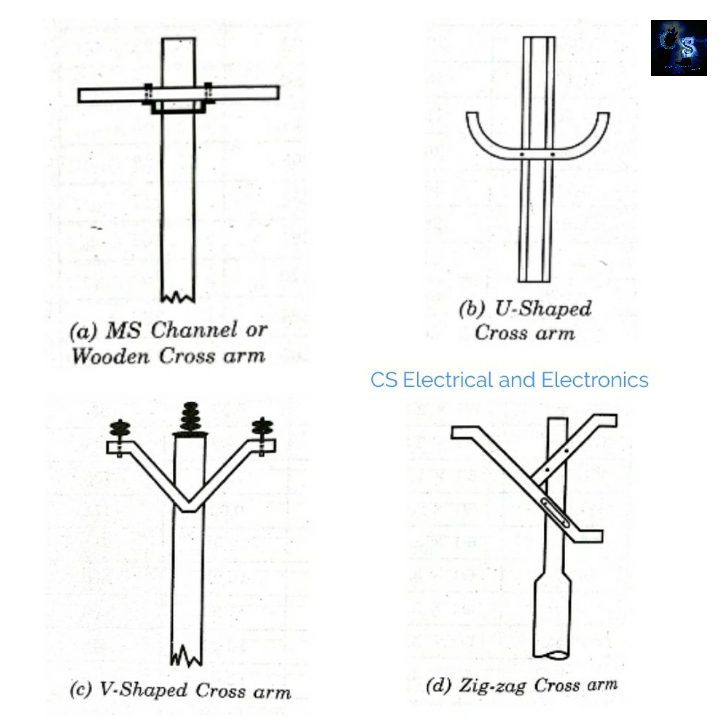
Wooden cross arms are commonly employed on 11kv And 33 kV lines. These are made of sal wood, seasoned Sheridan wood, or creosoted firewood. Grains of wood cross arms should be length-wise and completely free from knots. Wooden cross arms are preferred owing to their insulating property which provides safety to line staff and minimizes flash-over due to bridcage.
The usual lengths and x-sections of wooden cross arms in use are 1.5m×125mm×125mm for 11 KV lines and 2.1m×125mm×125mm for 11 KV lines and 2.1m×125m×125mm for 33 KV lines. Wooden cross arms need replacement owing to decay after 5-7 years depending upon weather conditions.
Steel cross arms are stronger and are generally used on steel poles. For lv distribution, the angle iron or channel iron cross arms shall be of a size not less than 50mm×50mm×6.4mm and 76mm×38mm. The length of the cross arms shall be suitable for the spacing of the conductors.
Cross arms shall be suitable and strong enough to withstand the resultant forces caused by insulators, their pins, the dead weight of insulator attachments, etc. To avoid birdcage on HT lines, V-shaped cross arms are used with pin insulators while straight cross arms are used with disc insulators.
The cross arm is fixed to the pole in such a manner that the load of the conductors is taken by the cross arm and not the clamp or bolt that fixes the cross arm to the pole.
07. Fixing of Pin Insulator
Once the cross arm is fixed now it’s time to fix the pin insulator. The pin insulator comes with a bolt and nut. In the cross arm, there will be some holes at some distance, insert the pin insulator’s bolt in the hole of the cross arm and then fix it with a nut.
08. Placing of Conductor
Once the pin insulator is fixed, place the conductor on the grooves of the pin insulators and then tie the conductor with pin insulators with the help of ties or wires as shown in the above image.
This was about “Erection Of Electric Poles“. I hope this article may help you all a lot. Thank you for reading.
Tag: Erection Of Electric Pole
Also, read:
- 10 Tips To Maintain Battery For Long Life, Battery Maintainance
- 10 Tips To Save Electricity Bills, Save Money By Saving Electricity
- 100 (AI) Artificial Intelligence Applications In The Automotive Industry
- 100 + Electrical Engineering Projects For Students, Engineers
- 100+ Indian Startups & What They Are Building
- 1000+ Automotive Interview Questions With Answers
- 1000+ MATLAB Simulink Projects For MTech, Engineering Students
- 2024 Is About To End, Let’s Recall Electric Vehicles Launched In 2024